Lords Of The Fallen Guide
Lords Of The Fallen Walkthrough will guide you on completing the entire gameplay.
Our Lords Of The Fallen Walkthrough will take you through all the different missions in the game. From the beginning until the end it will provide you with best tips, tricks and tactics that you can implement to advancing through the game. We also provide you with the best in game strategy guide to help you get through those tough boss fights or gathering the different type of collectibles, magic and much more.
LORDS of the FALLEN is a challenging Action RPG set in a medieval fantasy world ruled by a Fallen God. Fighting against the formidable Lords and Generals that command his demonic army is the main feature of the game. LORDS of the fallen rewards skill and persistence among dedicated Action RPG fans. The combat system consists of many complex skills that join both weapon mastery and supernatural abilities combined with large number of weapons, armors and upgrades. Large variety of items and gear can be found throughout re-exploration and investigating game’s deep and intriguing secret areas.
Lords of the Fallen is a third person Action RPG with a heavy focus on understanding and mastering the combat. Rather than 100 hours of side quests, the game’s progression will be more centered on players refining their timing in combat and tactics. It will be fast paced and demanding but will also reward players who put in the time to learn and explore the world around them. While not an open world sandbox, the game will feature an explorable world that can be expanded by revisiting prior areas. Magic also plays a role, as do a variety of weapon types, although there is a lack of specific details on how they interact.
Walkthrough page for Lords of the Fallen, providing you with a list of quests and locations in a recommended order. Please see Game Progress Route for a quick link of all locations. You can also visit Secret Areas to find out about hidden chests and items.
| Part 1 Intro Looking for the Key | Part 2 Captian Fight and Finding Kaslo |
Medieval fantasy world
- Filled with chaos and lethal danger, where player never feels safe
- The full history of both world and the player character unveils and dramatically changes throughout the gameplay
Fighting against the formidable Lords and Generals
- Even regular opponents make up a challenging duels
- Over 15 boss encounters including giant beasts
- Opponents include both supernatural being and humans
The combat system with many complex skills
- Large variety of tactical medieval based weapon fighting techniques
- Powerful and spectacular supernatural skills
Large variety of items and gear
- Classes of gear: Warrior, Rogue, Cleric
- Tons of hidden objects and locations
- Freedom of mixing different classes for both gear and skills
There are several side-quests in Lords of the Fallen and although they are not hugely involved and do not require a great deal of effort they do offer up some nice rewards including some nice lump sums of XP, new Trinkets, some powerful weapons and a couple of achievements/trophies.
Unfortunately, these side-quests can be easily missed as they are not pointed out to you, nor are they tracked in any visible way in the menus or on screen objective prompts. As this is the case, I have incorporated all of the side-quests in the game into the above walkthrough so as long as you follow it, you should be able to get them all done!
For your convenience, I have listed all of the side-quests I encountered in the game in order of appearance and a brief description on how to accomplish each below.
The Injured Monk Part 1
This is the first side-quest we can undertake in the game and it is broken down into several parts that span a good portion of the campaign.
Upon leaving the Keystone Monastery at the start and opening the gate, you will bump into the Injured Monk immediately outside. Speaking to him will start the side-quest. During the conversation agree to cut off his arm and then give him a potion afterwards to complete the first part. Note that you must give him a potion to have him appear later in the game for a follow up task.
Yetka's Dagger
You will meet Yetka for the first time as you approach the gate to the Square of Heroes (where we fight the Commander). Speaking with her a couple of times will have her give you a side-quest to find her dagger.
The dagger itself is in the Northern Watchtower but at this stage we cannot access it just yet. In order to reach it, you need to enter the Southern Watchtower (the one closest to Yetka). After going down the first set of stairs, kill the Marauder and the Rogue and then approach the hole in the wall close to the stairs we came down, look over the edge to find a small platform with the North Watchtower key on it. Drop down and grab it.
Continue along the wooden walkways here, going through the small stone passage on the right) and continuing until you reach the far end. Climb to the top of the tower via the staircases in here and kill the Marauder and three Infected at the top before looting the item in the middle of the room for the dagger.
Return to Yetka and give her the dagger. In exchange she will give you the Key to the Catacombs.
The Signal Fire
After defeating the Commander, go through the now opened archway and climb the stairs to the top. Follow the platform parallel to the stairs to find Loot Crystal #2 (this will have become active by killing the Commander). Follow the small path to the left of the Loot Crystal.
You should see a pair of enemies along this path in the distance – a Crossbowman at the base of the tower ahead and a new enemy – a Shieldman patrolling from the tower out along the wall and back again. Pick up the quest item Bloody Flint from the ground in the centre of the path and then take on the Shieldman when he returns.
Once you have the Bloody Flint, play through the area until you reach the Burned Watchtower. Fight off the enemies on the roof of this and then interact with the large pile of wood here to set it on fire. This will complete the side-quest.
Watch out because doing this will cause a Rogue to spawn and attack you from behind.
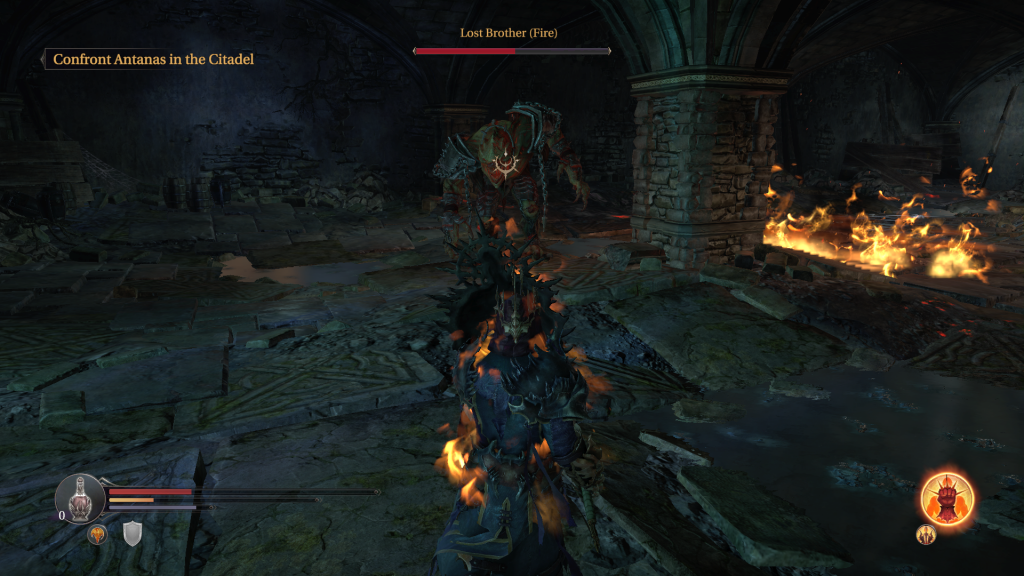
Later in the game, once you have spoken with Antanas and Kaslo in the Citadel, you will find a pair of guards talking about the Signal Fire. Speak with them to earn an additional 500XP.
The Stone Tablets
You'll be able to pick up this side-quest by speaking with Yetka by the large, locked gate to the Eternal Flame area on your first visit to the Rhogar Realm. There are 5 Ancient Plates in total and you can hand these in after killing the Infiltrator boss.
They can be found in the following locations:
- Eastern Antechamber – In the small room at ground level with the lever linking the two antechambers together.
- Western Antechamber – After killing the first Tyrant use the Small Western Antechamber Key on the second floor of the Western Antechamber (by the Crossbowman). Inside you'll find an Ancient Plate and a chest containing an Attribute Point Shard and a piece of Armour (leg - Cunning).
- Eternal Flame – in the small hallway beneath the Panorama to the left of the main Eternal Flame area. This is guarded by a Spellcaster.
- Abandoned Range – You can find this one in the small cave where you find the Checkpoint Crystal. It is guarded by Spiders at the back of the cave.
- Sacred Hallways – Just after entering the Sacred Hallways, this is just on the left as you go down the stairs towards the Tyrant.
The Crippled Rhogar
You will bump into the Crippled Rhogar immediately after killing the Infiltrator boss. This fellow will give you a side-quest to hunt down the Human Skull collectible items that can be found in the Keystone Crypt, Catacombs and Keystone Citadel. He will offer a reward for bringing them to him.
Upon leaving the Rhogar realm and returning, he will have moved to a snowy ledge overlooking a cliff in the Abandoned Field area by the back entrance to the main Temple (where we entered to fight the Infiltrator).
There are 30 Human Skulls in total (5 in the Keystone Crypt/Graveyard, 21 in the Catacombs and 4 in Keystone Citadel) and if you follow the guide you should be able to find them all by the time you reach him on your second visit to the Rhogar realm. There are a couple of rewards on offer for handing in Human Skulls and they include:
- 15 Human Skulls – Shield (Stance) + 2,000 XP
- 30 Human Skulls – Trinket (Leech) + 2,000 XP.
Note that upon handing in all 30 Human Skulls, the quest giver will summon a pair of Rhogar Knights and a Spellcaster to attack you. As such, make sure you are prepared for a fight before you speak with him! Once you have dealt with the enemies, kill the quest giver for the 30 skull reward.
The Deserters Part 1
You'll run into the deserters upon leaving the Rhogar Temple after killing the Infiltrator boss. Speaking with them will give you your first side-task. They want you to head over to the Western Antechamber in the Rhogar Realm and kill the Dimensional Beast located inside.
Note that this is optional, and the next side-quest involving these fellows will continue regardless of whether you complete this part or not. However, for clearing out the Western Antechamber and informing the deserters you have done so, you will be rewarded with 500XP and a Weapon (Dagger – Protector). You can also speak to them once more after receiving your rewards and hand over a potion for an additional 500 XP.
The Infected Monk
The Infected Monk can be found locked inside a cell in the Cell Circle portion of the Catacombs area. Speaking with him, he asks you to put him out of his misery.
To do this, we need to activate the lever to his right – but there is no lever handle! This can be found on the opposite side of the Cell Circle inside a wooden door near a statue and a large decorative level (we need to pull this to open the arena for the boss fight with the Champion).
Now return to the Infected Monk's cell and use the Lever Handle on the broken lever. This will open the doors. Kill the monk for 1,500XP and a Spell Point Shard. Enter the door to the right of the lever for a Shield (Buckler - Blocker).
Sven's Hammer
You'll find the Heirloom hammer behind a weak wall inside one of the cells in the Cell Circle portion of the Catacombs. This particular cell is located a couple to the left of the Infected Monk's cell and can be identified by a number of lit candles inside. Us your shield charge to bring down the wall and loot the Heirloom Hammer from the Altar inside.
We can now take this hammer to a specific sarcophagus located in the Catacombs in order to upgrade it. The sarcophagus is located off the main junction room (the room with three exits) that links the shortcut from the Checkpoint Crystal at the very start of the Catacombs to the Royal Tomb and Mines area of the Catacombs. This particular tomb we are looking for is located in the small Mines area, in the first door on the left (there is an Audio Note (Kyle's Sword) here if you have not already got it).
The Thief and the Murderer
You will come across the Thief and the murderer towards the end of the Catacombs. There are a pair of prisoners trapped in adjacent cells. Walk over and speak to one of them to learn of their predicament. Essentially we need to choose who lives and who dies and depending on your choice you will get a different reward. Saving the fellow closest to the stairs rewards you with a Trinket (Magic Leech) saving the other, will earn you the Trinket (Dim Hope).
If you save the fellow for the Dim Hope Trinket, you will find that a side-quest giver in the Citadel later on will be dead.
The Injured Monk Part 2
When you finally enter Keysone Citadel after your first visit to the Rhogar world and working your way through the Catacombs you will find the Monk near the top of the Citadel in the room opposite the triage area where all the wounded soldiers are being treated.
At this point the Injured Monk will ask you to go and clear out his research area of monsters so that he can continue his work into upgraded potions. The area that he wishes you to clear out is the Southern Watchtower – which if you remember correctly is the tower directly in front of you as you go out the gate of the Square of Heroes (where we fought the Commander/Beast).
Inside the tower you will find the usual suspects – Infected and Crossbowman on the roof, a Marauder and Rogue on the next level down and on the second level down you will find a Spider. The Spider is the monster that needs to be killed to complete the second part of the side-quest.
Once you have killed the Spider, return to the Injured Monk in the Keystone Citadel and tell him that the tower is now clear.
The Injured Monk Part 3
You will find the Injured Monk where we killed the Spider in the Southern Watchtower. Speaking to him will have him give you the third part of the side-quest. During this section, you will need to gather Tyrant Hearts (we need to do this to kill them anyway) and hand them over to him. Handing over at least four will have the monk upgrade your potions and the achievement/trophy ‘Extra Strong'.
The Tyrants are all found within the confines of the Rhogar realm and can be found in the following locations:
- Eternal Flame - The first time you visit the Eternal Flame
- Abandoned Range – in the snowy path leading to the cack entrance to the Rhogar Temple.
- Sacred Hallways – Encountered on the way to the Infiltrator boss fight.
- Sacred Hallways – After the Infiltrator fight, take the set of stairs to the left of the Crippled Rhogar.
- Interdimensional Bridge – On the bridge in front of the portal upon returning to the Rhogar realm after killing the Beast boss.
- Chamber of Lies – In the large open room with the pit in the centre after coming from the Altar Ruins (Yetka's floating toast room).
- Eternal Flame – Can be found inside Loot Crystal #7 after defeating the Guardian.
- Chamber of Lies – After entering the main temple via the locked door in the Eternal Flame, you'll find the Tryant in the first room.
- Chamber of Lies – Through the door on the left hand ledge in the location where there is pair of platforms running parallel with a Forger on either side. The Tyrant is immediately inside.
- Chamber of Lies – Right by the second lever we need to pull to extend the bridge to the Annihilator.
- Sacred Hallways - In the room where we fought the Infiltrator after killing the Annihilator boss.
- Sacred Hallways - In the room where we fought the Infiltrator after killing the Annihilator boss.
The Concerned Monk
You will find the Concerned Monk just inside the entrance to the Planetarium after speaking with Antanas at the top of the Citadel for the first time. He'll ask you to go and locate his brother who has gone missing.
Return to the Initiation Room (where we fought the first boss) and go through the left hand door (where we went after killing the Warden). There is a Shieldman and a Rogue waiting for you. After killing them, proceed down the first set of stairs and enter one of the doors ahead. In the small room between the two adjacent bedrooms, there is a weak wall. Sprint at the wall with your shield raised to go through.
Pick up the Cellar Quest Key from the ground in front of you. As you enter the next door, a Spider will attack you from the right. Try to fight him around your current position as there is an Infected a little further into the room as well. Once the spider is dead, ignore the two doorways below and instead move to the far end of the room and kill the Infected. Grab the Human Skull item nearby. Continuing past his location, there will be another Infected and an Audio Note (The Plot: Point Three) on the left.
Keep moving down the stairs and kill the Spider in the back left corner. Loot the Human Skull here. Note the weak wall behind where the Spider was located, run up and charge this with your shield up to break it down. Inside you'll find an Empty Bottle.
Exit the hidden room and note the nearby doorway with the lever next to it (we'll exit through here when we're done!).
At the bottom of the next set of stairs is a doorway leading to some cells and another Spider in front. Kill it and exit the cell room through the door at the far end, we'll be back near the start of the area. Note the pressure plate behind the half-open portcullis on the right (we'll check that out momentarily). Find the other stairway leading downwards here and kill the spider inside.
There are two doors along the left hand wall here. The first is locked (we can open this with the pressure plate) and the second, at the end of the corridor, contains a Checkpoint Crystal and a lootable item – Main Hall Chest Key. Save if you like. To access the pressure plate, you'll need to roll beneath the half-open grill. Inside you'll also find an Audio Note (The Plot: Dirty Work). Use the Prayer spell to create a clone on the pressure plate and then return to the now opened door.
Inside, kill the Spider. Walk up to the glowing cocoon nearby and interact with it to update your objectives. Loot the item that drops from the cocoon for the Citadel Cellar Key. Loot the item crystal nearby for a Weapon (Fist - Needles). Head back to the locked door with the lever we spotted earlier and move on through.
Once you have investigated the cocoon, you can return to the Concerned Monk in the Planetarium to give him the good news for 4,500XP.
You should now also be able to unlock the previously locked chests either side of the Concerend Monk for some new Armour (Chest, Legs and Wrist - Persistance).
The Deserters Part 2
After killing the Infiltrator and returning to Keystone, as you exit the portal a scene will play. Once the conversation with the wounded soldier is over, he will drop an item a Human Tatoo. Grab this and proceed through the game. Once you arrive in the Keystone Citadel, you will meet the captain of the guard. Upon speaking with him, he'll ask you to track down and kill the deserters who fled to the Rhogar realm and provide proof of doing so by collecting their Human Tattoo quest items. There are 5 Human Tatoos in total (1 in Keystone Crypts we picked up earlier and 4 in the Rhogar Temple).
After returning to the Rhogar world, depending on whether or not you completed the first part of the deserters side-quest previously in the game, the deserters will appear in different locations.
- If you helped the deserters previously by clearing out the Western Antechamber when requested, you will find them in the Western Antechamber. When you meet with them again you will find a dead soldier we can loot for a Human Tattoo and there is another under a tile nearby (doesn't seem to appear in the world, but the button prompt to pick it up will occur). We can also speak to the survivors and encourage them to attack the Guardian boss – doing this will allow you to loot their corpses after said boss fight. This will also net you a new Trinket (Amulet of the Betrayer).
- If you did not help the deserters previously, their bodies will appear strewn across the Panorama from the entrance to the Eternal Flame to the main entrance of the main Temple. Looting each of these bodies will net you a Human Tattoo each, with the final one also giving the Weapon (Dagger – Defender).
Once you have all of the Human tattoos, return to Keystone Citadel and speak with the guard captain. You will be rewarded with 1,000XP and a Trinket (The Great Burden).
I am unsure when the actual point of no return is for this side-quest, but I was unable to do so once I killed the Annihilator boss. as such, I would recommend handing it in after fighting the Guardian.
The Poison Beast
Following the boss fight with the Beast, speak with the human knight who magically appears in the courtyard with you to receive yet another side-quest – to kill a Poison Beast in the citadel.
Return back inside the Citadel and follow the main hall until you bump into the guard who appeared outside when we killed the Beast. Speak to him to start the next part of his side-quest. When you are done, head through the now unlocked door opposite his position. It's the Initiation Room where we fought the Warden at the start of the game! This time however, there is a new baddie in his place.
Once you have killed the Poison Beast, loot the Sealed Rune (Small) he drops and then return to the quest giver and speak to him for another 7,500 XP.
Mages of Mystralia Archmage is an Adventure, Indie, Action, Magic, Female Protagonist, Fantasy, RPG and Great Soundtrack video game. It is single player game. The game was released for Microsoft Windows. In Mages of Mystralia, you play as Zia, a young girl who discovers that she has been born with an innate sense of magic. Unfortunately, magic has been banned, so she strikes off to train on her own to gain some control over her powers. Since our last post, we’ve been working hard on the next big patch for Mages of Mystralia. We are really excited to officially announce that the Archmage Mode patch will be deployed on August 22nd on PC (Steam, GOG, Humble Store, Twitch store) and at launch on consoles. A UNIQUE MAGIC CREATION SYSTEM With nearly infinite different types of combinations, the magic system in Mages of Mystralia is one of the most complete ever created in a video game. Use your creativity to design the spells that you’ll bring on your adventure. Ingenuity will allow you to defeat powerful monsters and solve complex puzzles. Mages of mystralia archmage update.
The Planetarium Element
After defeating the Beast Boss, look back towards the Citadel and just to the right of the door leading to the Citadel you'll be able to see an item we can pick up – the Planetarium Piece.
Return to the Planetarium and talk to Antanus to turn the object in. Once you have handed the item over you'll be treated to a short cut-scene and earn yourself 1,500XP.
The Cursed Sword
This short side-quest can be found in the Cemetery where we fought the Worshipper earlier. Clear the area of enemies and once it is safe, look for a hole in the ground beneath a large tree (almost directly opposite the gate to the demon realm portal). You can interact with the hole.
If you have the Cursed Sword (which we can find in the Old Quarters section of the Citadel) you will gain the option to bury it. Doing so will summon a spirit which will attack you and you'll need to dispatch it.
Killing the spirit will earn Harkyn 1,500XP, an upgraded version of the Sword (Sword - Cursed Sword) and an achievement/trophy 'I Feel Lucky'.
The Injured Demon Hound
Once you return to the Rhogar realm after defeating the Champion and the Beast bosses make your way up to the Panorama, to the area where we fought the first Dimensional Beast in the game. As you continue along the platform towards the path to the Abandoned Range, you'll encounter a Demon Hound. Attacking this will see it run off.
Make your way down the snowy path to the Abandoned Range and Kill the Dimensional Beast at the base of the stairs. From the fire here, take the left path to find a bunch of burning debris. You'll also find the Demon Hound we attacked earlier that ran off.
Attacking it here will have another pair of Demon Hounds spawn nearby and attack you (there is also a Forger on the far side of the area so try to keep away from there!). Once you have killed all three Demon Hounds, one will have dropped an item. Loot this for a Trinket (The Keep).
The Runic Inscriptions
Once you have defeated the Guardian boss, you can enter the main Rhogar Temple from the Eternal Flame. As soon as you enter, look to your left to find Yetka standing nearby looking at a Runic Inscription on the wall. Talk with her for a Stone of Divine Understanding and several audio notes. The Stone of Divine Understanding will allow you to read the glowing runic inscriptions.
There are four of these inscriptions in total hidden within the Rhogar realm and finding and reading all four of them will net you 1,500XP and four Audio Notes. They can be found in the following locations:
- Chamber of Lies - Right in front of Yetka in the Chamber of Lies.
- Chamber of Lies - In the small room with the Anvil next to the first of the two switches we had to pull in the Chamber of Lies to reach the Annihilator.
- Eastern Antechamber - On the second floor of the Eastern Antechamber opposite the entrance.
- Sacred Hallways - Through the door to the left of where we spoke with the Crippled Rhogar after the fight with the Infiltrator.
The Tor Hammer
The Tor Hammer is located in the Chamber of Lies, guarded by a Spirit and a Tyrant in the room with the second and final lever we need to pull to extend the bridge to reach the Annihilator (and the giant monster).
The Tor Hammer can be used to destroy the small Rhogar statues that we have seen about the place. In order to do this, you need to have Harkyn equip the weapon and make sure you have the two-handed option available (use triangle/Y to cycle between stances). Once that is good to go, you simply need to approach and melee each of them. There are four of these statues in total and destroying these will earn you the Armour Set (Last Traitor).
They are located in the following areas:
- Chamber of Lies - The room after where Yetka gave us the ability to read the runic inscriptions on walls. This will earn you the Last Traitor (Wrist).
- The Panorama – On the Panorama area above the Arena where we fought the Guardian. Right next to the snowy path leading down to the Abandoned Range. This will unlock the Last Traitor (Head).
- Altar Ruins – On the second floor of the flying toast room (where we had to unlock the door for Yetka) on the side of the room leading to the roof. This will net you the Last Traitor (Legs).
- Chamber of Lies - On the platform where we fought the first Dimensional Beast imbued with fire. Right near the entrance to the Annihilator's boss fight arena. This will reward you with Last Traitor (Chest).
The Unity Staff
The Unity Staff is a staff weapon that has a unique trait of having an electricity enhancement on it. It is not easy to obtain however as you are required to find two pieces of the staff and then take them to a specific location to find a chest with the staff inside.
The Staff pieces can be found in the following locations:
- Weapon Hilt - In a sealed rune door to the right of the exit to the Spider room off the Northern Edge of the Chamber of Lies.
- Staff's Head - Behind a locked gate on the Northern Edge of the large chasm in the centre of the Chamber of Lies. There is a hard to spot lever to open this gate on the Southern Edge of the same room, located on the wall by the cliff's edge where there is a Checkpoint Crystal and we fought the Tyrant, Golems and Dimensional Fire Beast. Pull this lever and then return to the now unlocked gate. Inside you'll find a Fire Golem, a pit to jump and a chest containing the piece of the weapon.
Now that we have both pieces of the Unity Staff, make your way back to the area where you fought the two forgers on platforms either side of a gap earlier. Remember the locked gate on the left hand platform here? If you open your inventory screen and equip the Staff's Head as Harkyn's weapon, you can use a melee attack on the gate and it will open. Inside is a chest containing a new Weapon – Staff (Unity).
Note that looting the Unity Staff will have a Spirit spawn on the small balcony platform just outside the room, so be prepared to fight as you leave!